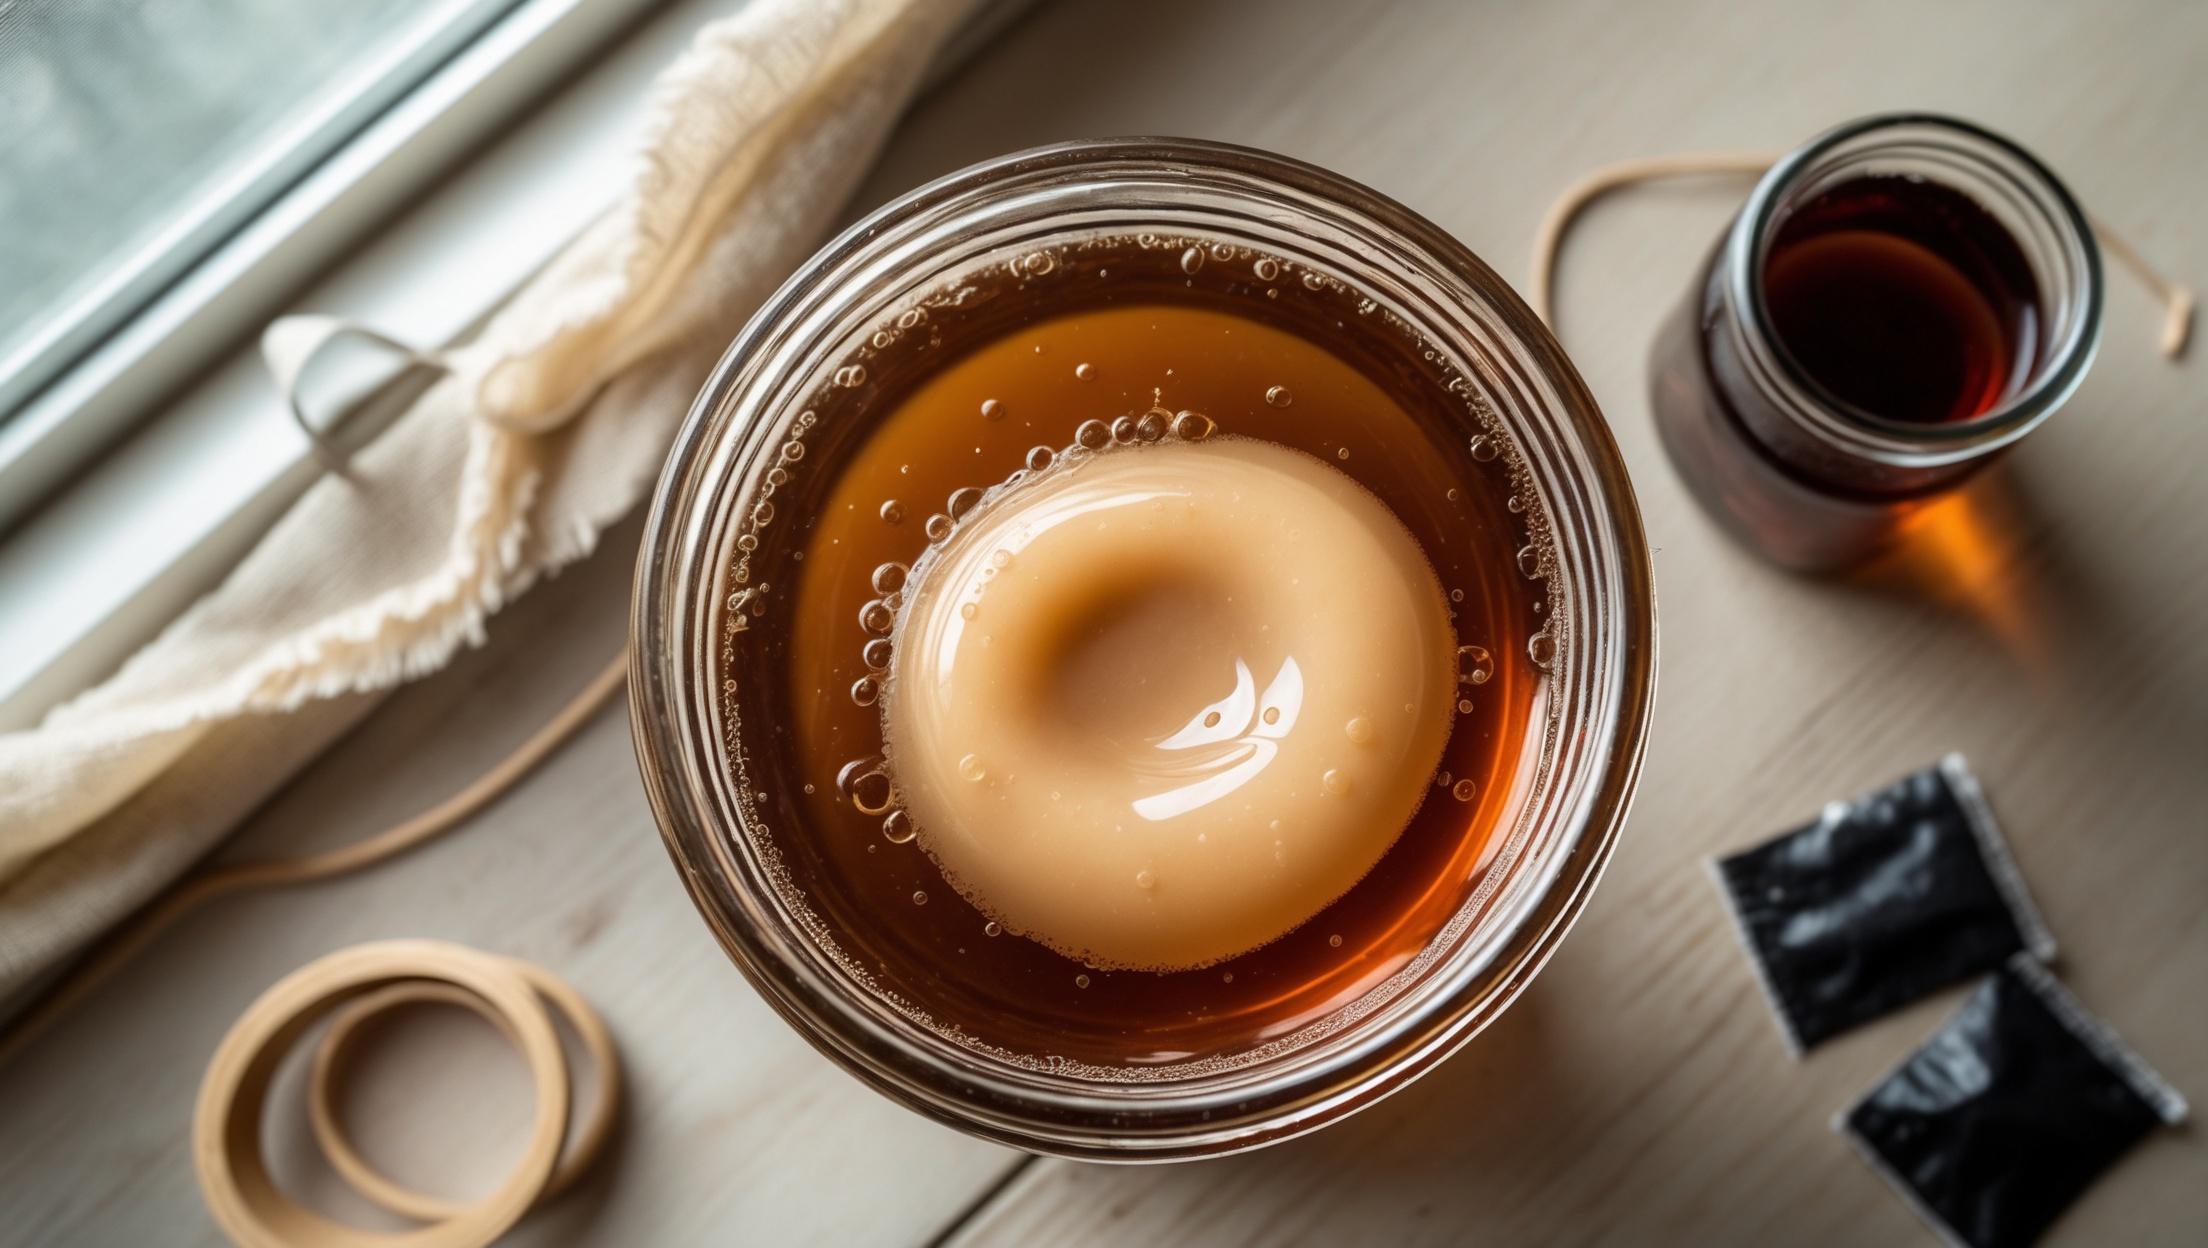
A kombucha SCOBY forms from raw, unflavored kombucha combined with sweetened black tea, left undisturbed at room temperature for 1 to 4 weeks. The culture needs no starter SCOBY — only live kombucha, sugar, tea, and time.
Growing a kombucha SCOBY from scratch uses 1 cup of raw, unflavored, unpasteurized kombucha plus sweet black tea made from 7 cups water, 1/2 cup sugar, and 4 tea bags. A pellicle typically appears within 3 to 7 days and reaches a usable 1/4-inch thickness within 1 to 4 weeks at 64–79°F. No store-bought SCOBY is required. The main risk is mold, not failure to form — the New York State Department of Agriculture and Markets sets 4.2 as the pH ceiling for a safe kombucha batch.
What Do You Need to Grow a Kombucha SCOBY From Scratch?
Growing a SCOBY from scratch requires 1 cup of raw, unflavored kombucha, 7 cups water, 1/2 cup white sugar, 4 black tea bags, a 2-quart glass jar, and a tightly woven cloth cover. No commercial starter culture is needed.
A SCOBY (Symbiotic Culture Of Bacteria and Yeast) is a rubbery, cellulose-based mat that forms on the surface of sweetened tea as the bacteria and yeast in the liquid metabolize sugar into acids and gases. The mat itself is often called a pellicle, the thin skin the culture builds as it grows across the surface of the liquid.
The starter kombucha has to be raw and unflavored. Pasteurized kombucha has no living bacteria or yeast left to seed a new culture, and flavored or fruit-infused bottles dilute the acidity a new pellicle needs to fend off mold. Black tea supplies tannins and nitrogen compounds the culture uses to build its cellulose structure; green tea works as a substitute, but black tea is the more forgiving default for a first attempt.
The jar matters more than most guides admit. A 2-quart or larger glass jar gives the pellicle room to spread into a full, even disc instead of a thick, uneven clump. The cover has one job: let air in while keeping fruit flies and dust out. A tightly woven cloth, a few layers of paper towel, or a coffee filter secured with a rubber band all work; a solid lid does not, since the culture needs oxygen exchange to form.
White sugar, not honey or artificial sweeteners, feeds a new culture. Raw honey carries its own microbial load that competes with the SCOBY-forming bacteria, and artificial sweeteners provide no fermentable sugar at all. Black tea also ships more tannin and nitrogen than herbal blends, which is why bottles labeled “herbal kombucha” make a weaker starter — they often lack the tea-derived nutrients a new culture needs to build a stable pellicle.
How Do You Grow a Kombucha SCOBY Step by Step?
The 4-Step Raw-Starter Method brews sweetened black tea, cools it to room temperature, mixes in 1 cup raw kombucha, and rests the jar undisturbed under a cloth cover for 1 to 4 weeks until a 1/4-inch pellicle forms.
Step 1 — Brew the sweet tea. Bring 7 cups of water to a boil, remove from heat, and dissolve 1/2 cup of white sugar completely. Add 4 black tea bags (or 1 tablespoon loose-leaf black tea) and let the tea steep as it cools. Remove the tea bags once the liquid reaches room temperature; hot tea added to the starter kills the live culture.
Step 2 — Add the raw starter. Pour the cooled sweet tea into the glass jar and add 1 cup of raw, unflavored, unpasteurized kombucha, including any stringy or blobby culture strands visible in the bottle. Stir gently to distribute the starter through the tea.
Step 3 — Cover and rest. Secure the cloth cover with a rubber band and place the jar somewhere at average room temperature, away from direct sunlight and away from anywhere it will be bumped or moved.
Step 4 — Monitor and harvest. Check the surface every few days without stirring the liquid. A thin, translucent film usually appears within the first week; it thickens and turns opaque over the following 1 to 3 weeks until it reaches roughly 1/4 inch.
How Long Does It Take for a SCOBY to Form?
A kombucha SCOBY takes 1 to 4 weeks to reach a usable 1/4-inch thickness. The first thin film appears within 3 to 7 days at 64–79°F, and warmer rooms near the top of that range speed pellicle formation.
The timeline breaks into three stages. In the first 2 to 3 days, the liquid looks unchanged — this is normal, not a sign of failure. Between days 3 and 7, small bubbles collect on the surface and a thin, jelly-like film begins to spread. From the second week onward, that film thickens, turns from translucent to opaque white or tan, and eventually reaches a firm 1/4-inch mat that can be lifted out in one piece.
Room temperature is the single biggest variable in that range. A jar kept near 79°F often finishes in 10 to 14 days, while a jar in a cooler 64–68°F kitchen can take the full 4 weeks. Neither speed is a problem on its own — a slower, cooler ferment is not less safe, only slower.
How Do You Know a SCOBY Is Healthy, Not Moldy?
A healthy new SCOBY looks like a smooth, pale tan to white jelly pancake with no fuzzy texture. Mold appears as raised, fuzzy blue, gray, green, brown, or black spots — any fuzzy growth means the whole batch must be discarded.
A young, healthy pellicle can look uneven, wrinkled, or have brown stringy yeast strands hanging beneath it — all of that is normal. Mold, by contrast, sits raised above the surface of the liquid and looks powdery or fuzzy rather than smooth and rubbery. Colorado State University Extension identifies fuzzy blue, gray, green, brown, or black growth as the clear signs of a contaminated batch.
This article is not medical advice. If mold appears on a growing SCOBY, discard the entire jar — liquid, culture, and all — and do not attempt to skim mold off or reuse any part of the batch. The New York State Department of Agriculture and Markets advises against reusing culture from any batch that shows signs of contamination. When in doubt, throw it out and start a fresh batch.
Testing acidity directly removes most of the guesswork around whether a new culture is developing safely. A Kombucha pH Test Strips kit (paid link) lets a new brewer confirm the batch is dropping toward a safe range within the first week, rather than guessing from appearance alone.
What Temperature and Conditions Work Best?
A kombucha SCOBY forms fastest between 64°F and 79°F (18–26°C), away from direct sunlight and cooking fumes. Temperatures below 64°F slow bacterial activity, and drafts or open lids invite fruit flies and airborne mold spores.
Direct sunlight heats the jar unevenly and can push the liquid above the ideal range, while a spot near a stove or dishwasher exposes the culture to steam and grease particles that raise contamination risk. A closed pantry shelf, the top of a refrigerator, or an unused kitchen counter corner all work, provided the spot stays within the 64–79°F window and the jar is never sealed with an airtight lid.
What Should You Do With a New SCOBY Once It Forms?
A freshly grown SCOBY brews its first full batch immediately, paired with 1 to 2 cups of the tangy liquid underneath it as starter tea. Storing a new SCOBY dry or without acidic starter liquid invites contamination within days.
The liquid beneath the new pellicle is already acidic starter tea — do not pour it out. Move the whole jar, culture and liquid together, straight into a first full batch following a standard kombucha recipe, or transfer the pellicle with 1 to 2 cups of that liquid into a SCOBY hotel if a brew is not starting right away. A homegrown SCOBY also produces a new baby layer with every subsequent batch, so one successful grow-from-scratch attempt supplies cultures for future jars indefinitely.
💬 My Take
The common assumption is that a store-bought SCOBY guarantees success while growing one from scratch is a gamble. In practice, both methods carry the same core risk: not enough starter acidity. The New York State Department of Agriculture and Markets ties safe kombucha fermentation to a pH ceiling of 4.2, and that threshold depends on the starter liquid’s acidity — not on whether the culture came from a bottle of store kombucha or a mail-order SCOBY. A bought culture skips the 1-to-4-week wait, but it still fails if the jar gets too little starter tea or sits somewhere cooler than 64°F. Growing from scratch costs the price of a bottle of raw kombucha already sold in most grocery stores, and it produces a pellicle sized exactly to the jar it grew in.
- Ratio: 7 cups water, 1/2 cup sugar, 4 black tea bags, and 1 cup raw unflavored kombucha per 2-quart jar
- Formation window: 1 to 4 weeks total, with the first visible film by day 3 to 7
- Ideal temperature: 64–79°F (18–26°C), per Colorado State University Extension
- Safety ceiling: pH below 4.2, per New York State Department of Agriculture and Markets guidance
- Discard immediately: any fuzzy blue, gray, green, brown, or black growth — no partial saves
- Use right away: brew the first full batch with 1 to 2 cups of the starter liquid beneath the new SCOBY
Frequently Asked Questions About Growing a Kombucha SCOBY
These five questions come up most often once brewers have the basic method down — they fill in details the sections above do not cover directly.
Can you grow a kombucha SCOBY without buying one?
Yes. Any bottle of raw, unflavored, unpasteurized kombucha from a grocery store contains enough live bacteria and yeast to seed a new SCOBY within 1 to 4 weeks, without ordering a starter culture.
Does a new SCOBY have to be thick before its first use?
No. Even a thin, translucent film can brew a first batch, though a 1/4-inch pellicle handles the acidity swings of a full batch more reliably than a very young, fragile film.
Can flavored or pasteurized store kombucha grow a SCOBY?
No. Pasteurization kills the live bacteria and yeast needed to start a culture, and flavored or fruit-infused kombucha dilutes the acidity a new pellicle needs to resist contamination.
How many times can a homegrown SCOBY be reused?
Indefinitely, as long as it stays free of mold. A healthy SCOBY grows a new baby layer with every batch, and older layers can be composted or given away once a SCOBY hotel gets crowded.
Is a thin, wrinkled, or uneven new SCOBY normal?
Yes. First-generation pellicles are often thinner and more uneven than mature ones. Thickness and evenness typically improve with each subsequent batch as the culture stabilizes.
Sources and Further Reading
The following sources informed the ratios, timing, and safety thresholds in this guide.
- New York State Department of Agriculture and Markets · agriculture.ny.gov · Kombucha processing guidance covering safe pH thresholds, standard fermentation times, and contamination handling for home and commercial brewers.
- Colorado State University Extension · extension.colostate.edu · Guidance on kombucha fermentation temperature ranges and how to visually distinguish a healthy SCOBY from mold contamination.
- The Kitchn · thekitchn.com · A tested step-by-step method for growing a kombucha SCOBY from store-bought raw kombucha, including ingredient ratios and formation timeline.
- National Center for Home Food Preservation, University of Georgia · nchfp.uga.edu · USDA-affiliated research center publishing tested guidelines for home fermentation, including kombucha tea.